
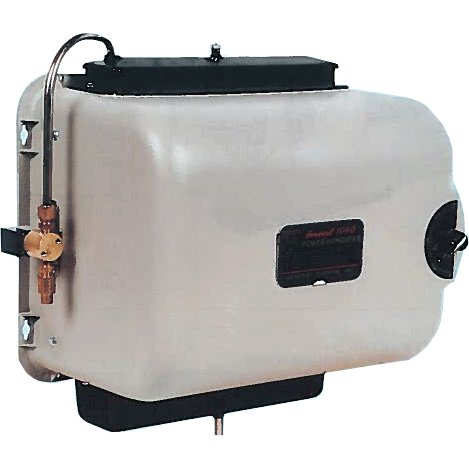
 1040 Bypass Style Humidifier Repair Help
Maintenance
Hi, I’m Jay, and today, I'm going to talk about performing winter start up maintenance, on your GeneralAire humidifier. Now this one happens to be a bypass style, but it does use a fixed pad. There are different versions of this, but essentially all those fixed pad style GeneralAire humidifiers and maintenance are basically the same.
Be sure to turn the power off before performing any maintenance. Before performing this service, it is necessary to shut off the water. Find the saddle valve, turn it clockwise, until it stops.
Ok, so I like to start by removing the drain pan first. So first thing we're going to do is take these nuts off the bottom. there's one. And there's two.'m going to set these on the side. Alright, now let's lower the drain pan. There we are. Here's our pad, we're going to take this humidifier filter, and dispose of it. And now I'll just take this drain pan, now we're going to want to get this washed out, before we put it all back together with a new filter. This part, here, gets washed, so we'll set this on the side. Alright, so the other part you'll want to take off is the water distribution tray on the top. It requires a couple of wrenches right here, 9/16 and half inch. Alright, let's set this on the side. Ok, the water distribution tray is held on by two more of those finger nuts. We'll remove them, alright, here they are. We'll set them on the side. Alright, no we've got a water distribution tray, that's got a cover on top. So, we can pop the cover off. There we are. We'll set those on the side. And this is another item that gets rinsed off. Now we're ready to put it all back together. Alright, now that the water distribution tray and the drain pan are washed out, we're going to go ahead and put this together with a nice new pad, but I want to show you how this is supposed to get assembled in my hand, so that you can see what happens when do it inside this cover here. So, here's the water distribution tray, lets get the filter. And that has to go up inside this opening here, so it has to end up like this. And, the water pan here, the drain pan, ok, it has to go together like that. Ok, so that's what you're trying to do but you're trying to do that inside of this cover, where you can't really get in there to play with it. Now there's a cover right here, and you can remove this little door. And you can look inside of there to get this lined up. It makes it a little easier if you can get in there and see it with a flashlight. So, what we're going to do is put this together on the unit. So, let's see here, we'll do this one at a time here. Alright, and we'll put the nuts on that. Alright, so the water distribution tray is now in place. Now we'll put the feed tube back on. And we'll tighten that up. Alright, now let's take this cover off, so we can look inside of there and if you have a flashlight you can look inside of there and see this going together. So, we're going to take a humidifier filter and install it. Ok, again, this large opening here, paint mark, that's the top. So that goes in. And because we have this little window here, we can look inside of there and see, to get it lined up. Alright. Alright that's kind of a bit of a snug fit, so that's going to stay in position for me. Alright, now we can put these two nuts back on. Alright, we're going to make those hand tight. Alright, and then, this is the damper control knob, we're going to put this into the open position. Some units say "winter" on them, so either the open position or "winter," which is the same thing, and if you look inside this window here, you can see this damper is actually facing this way right now, ok. In the summer, or "closed" position, the damper is in this position, closed. So, it's humidification season, we want to leave it open. Ok, so the damper is in this position and you can look inside and see the damper blade. Now we can put this cover back on, and that's it. Now all we have to do is turn the water on and the electricity, and test it, then we're done.
Thanks for watching! For additional help or questions, feel free to contact us.
Troubleshooting: Water Not Running
Hi, I'm Jay, and one of the common problems we run into in the field, is a humidifier that is not feeding water, through it.
So, we have the humidifier turned on, the furnace is turned on, we have no water coming down the drain here. So, we're going to start here. Ok, the supply line to the humidifier, make sure we actually have water here. So, an easy way to do that, is with a bucket and first thing we want to do is turn the water off. Be sure to turn the power off, before performing any maintenance. Before performing this service, it is necessary to shut off the water. Find the saddle valve, turn it clockwise, until it stops.
Ok, now that we have the water turned off, we're going to disconnect this fitting here. So, I have a couple of wrenches. Ok, so, we're going to get a bucket out, and we're going to point this down into the bucket. Alright, now I'm going to have my assistant turn the water on. Alright, so as you can see we have a good flow of water. So, we have good water at this point, so this is not the problem. So now, I'll have my assistant turn off the water.
Alright, now that we have the water turned off again, let's talk about this. If when we went and tried this excercise here, when the water is turned on, and we had no water coming out of this line, our problem is upstream. It is likely that if you had a self piercing saddle valve, that valve is plugged, and needs to be replaced. The other possibility is, you have a different kind of valve, and for some reason, the valve is not opening. But in the event, as long as you have water here, you're good, if you don't the problem is upstream, and is likely a problem with a valve that is not opening. Now, we'll reconnect this pipe.
Ok, now we have the water supply line, reconnected and tightened up. So now we can turn the water back on, and check the next piece.
Now that everything else is done, you can turn the water back on. Locate your saddle valve, and then turn it counter clock wise.
Ok, the next thing we'll verify, is the water going out, just for the heck of it. We're going to disconnect this, spin this around, and put it in the bucket and see what happens. So right now we have turned the water back off, and we're going to test this. Alright, let's get out bucket. Ok, alright now we're going to have our assistant turn the water back on. so, we have the furnace running, the humidistat is spun all the way up, the water is turned on, we know we have water to this point, because we've tested that already, and we have no water coming out of the top, so this valve is either not powered, or it's powered, but it's not opening. So now, we have to do the final test. Alright, let's put this back, and we'll tighten that back up. Alright, so we have our distributor tube put back in, and the water is on right now. The humidistat is turned up, furnace is on, we should have power here. So, let's check if we have electricity here. So right here, we have a volt meter, it is set on AC volts, and we're going to test this thing. So let's disconnect one of them, and the second one. Alright, let's see what we have here. Ok, we have 21.3 volts, AC. so, this valve should be open. The water is turned on, again, we know we have water to this point, this valve should be open. Right now it does have power, and we have no water leaving the valve. So, this valve is stuck closed. That is not an uncommon failure, so all we have to do now is replace this valve.
Thanks for watching! For additional help or questions, feel free to contact us.
Troubleshooting: Water Won't Stop Running
Hi, I'm Jay. A question we get all the time is, "why is there water continuously running down the drain in my humidifier?" Ok, this is an easy one to test for. So, there's water coming down the drain here, and we have tried turning the humidistat all the way down as low as it can go, water continues to run down the drain. Alright, so, next thing is to check the solenoid valve. So the easier way to do that is to just disconnect one of these wires. Now this happens to be a 24 volt solenoid valve, so it's real simple, and it's safe. We just want to remove, one wire. Ok, you want to keep these wires away from anything, you don't want to have them touch the duct work or anything because that will short them out. We're going to keep these wires hanging in the air, so now we have no electricity going to the solenoid valve, and it should close so what you want to do is, now that it's disconnected, wait several minutes and take a look at the drain to see if water is still trickling down it. If water continues to trickle down the drain, after these wires, this one wire here is disconnected, well that means you have a bad solenoid valve.
I have here a 120 volt version of the solenoid valve, this is the 24 volt version, the one with the box on it like this, and these are on some of the older models. This happens to be a 120 volt version of this valve. Ok, like I said you can tell from the end of it here. If you have this style, the 120 volt version, you want to turn the power off to the furnace and the humidifier, then take a look, wait five minutes, see if there is water trickling down here, if there is, one of two things is happening, either this valve is stuck open, or you still have electricity going to it for some reason. I would then take a look at the wiring here and make sure that you're 100 % sure that there is no electricity going to this valve at that point. Um, because maybe there still is. And as long as there is no power going to it, this valve should close, and if you wait about 5 minutes you should see no water trickling down the drain at that point.
Thanks for watching! For additional help or questions, feel free to contact us.
FAQs
Water Flow - What Is Considered Normal?
Hi, I'm Jay, and a common question we get here is "There's water trickling down the drain, is that normal?" Yes. Right now we have a bypass style humidifier, and this is true with all of the Generalaire bypass style humidifiers that have a fixed pan in them and a solenoid valve on them. Ok, and as well as the fan powered units. If they have a solenoid valve on them, this is how they work. The humidistat says "hey I'd like some moisture," it opens up the solenoid valve, and water goes through this little orifice right here, to meter the amount of water that goes into the humidifier, goes up the valve, goes up the top and into the water distribution tray, gets evenly distributed, runs through the pad. And whatever is not evaporated, so whatever is left, gets accumulated by this drain pan here and goes down the drain. So these are actually designed to be self cleaning, and the way that it's done is a little bit more water than it can evaporate, is put through the humidifier. So the plant has determined how much water can normally be evaporated, they've added more to that, and that amount of water then goes through the humidifier and whatever does not get evaporated, cleans the pad, and gets accumulated by this drain pan here and goes down the drain so you'll see a little water trickling down here, that's normal whenever the humidifier is running. So if there is a ton of water flying down the drain, that's not normal. If there's no water going down the drain, or water's just dripping, down the drain while the humidifier is running, there's a problem. But it is perfectly normal for water to be trickling down the drain, when the unit is running.
Thanks for watching! For additional help or questions, feel free to contact us.
Summer Shutdown Procedure
Before performing this service, it is necessary to shut off the water. Find the saddle valve, turn it clockwise, until it stops. When shutting down the bypass style humidifier, for the summer, you will need to turn the humidistat down to its lowest setting.
If you look inside this window here, you can see this damper is actually facing this way right now. Ok, in the summer or closed position, the damper is in this position, closed. That is the position you want it in when you aren't using your humidifier. So, you will want to close the damper inside the humidifier.
I'm your host Jay, thank you for watching. For additional help or questions, please feel free to contact us.
Humidistat: How It Works
Hi, I'm Jay. And Today I am going to talk about one of the most common questions we get every year is, "how do I set my humidistat for my humidifier?" so, right here is our demonstration unit, and we have two humidistats here.
The one that's installed, is an automatic style. Which is a fancier type, it's digital, it's a nice display, it will raise and lower the humidity setting, based on how cold it is outside. The colder it gets, the lower it will set your humidity to. the purpose of that, is to stop your windows from fogging. If it's very cold outside, it brings the humidity way down because if you keep it where we'd really like to keep it, which is about 45%, you'll end up with windows fogging and frosting, and potentially damage your home from that. So, even though we'd really like to have 45%, year round, in most applications, you can't really get there without damaging the home. So, in the bitterest part of the winter, this unit will automatically take the set point for humidity and go from 45% and just keep lowering lowering it lowering it, until it's compatible with the temperature outside. So, it does that automatically.
Now, this is an analog or mechanical style humidistat. This one is much more common and this one you kind of just turn the knob here, and you have to do the thinking if you will, because it doesn't look at the outdoor air temperature, so it has no idea what the outdoor air temperature is. so, we have a little chart, that kind of gives us the suggest set points, and I'll talk about that a little bit later, but basically with this one, you kind of set it somewhere around the middle or so here. And, you see how that works for your house, if the windows begin to fog up or sweat, you just set the humidity a little bit lower, and give it a couple of days, if that's still not low enough, you go a little lower, and you give it a couple of days. As winter starts to fade away, and it gets warmer outside, you can go back here and start raising this thing slowly. And until you get to where you're comfortable, you can have kind of a happy mix between comfort in the house, and the windows not fogging up. So, that's what you need to do with these. Again, 45% is ideal. But you can't really set it at 45% in most homes, when it's zero outside, because your windows will fog.
So, we're going to set this on the side, alright, so let's talk about this automatic one, because it has some really nice features. OK, this humidistat is in the auto mode, it says that the humidity in the duct work here is 38% and the plus sign in the droplet here means that it is calling for humidity, so, the humidifier is running right now. If we take a look at this button here, which is the temperature. We can see that, this duct work, here, the temperature inside that duct work is 81 degrees Fahrenheit. If I press the button again, it says the outdoor air temperature is ten degrees Fahrenheit. So, the outdoor air temperature sensor, which we have done some movie magic to, right now, it's saying it's, well it's just changed, now it's saying it's 11 degrees Fahrenheit, and we have 38 percent humidity in this return air duct work right now, where the sensor is on this. And it is calling for humidity. when you install this humidistat, you need to tell it what type of home you have. So, that is done here, with these little arrow buttons in automatic mode.
Ok, so we're in automatic mode, which means we have an outdoor air sensor installed, so we want to tell this what kind of home we have. There are ten possibilities here. So, it's done by pressing one of these buttons down here. OK, right now it says, 10 is a set point, and we can change it all the way down to 1. And the reason behind that, is an older home with no insulation, will have a tendency to sweat. The windows will sweat, and potentially moisture will develop inside the walls of the home, if the humidifier is set a little too high, and its extremely cold outside. So, on an older home, you basically have to set the humidity a little lower than you'd like. with a newer home, you can set the humidity higher, than an older home. So, there are 10 of these. And it's based on five different types of homes, basically 1 and 2, either one of those are a good setting for a home that is older than 1950, with no vapor barrier, and little insulation. A 3 or 4 setting, is designed for homes built between 1950 and 1965, with no vapor barrier, and R6 insulation. A setting of 5 or 6 is for homes built between 1965 and 1975, with a craft vapor barrier and an R11 insulation. A setting of 7 to 8 is for homes built between 1980 and 1990, with craft vapor barrier and R19 double pane windows. And finally, a setting of 9 to 10 is designed for homes built after 1990, ipoly vapor barrier, R38 insulation, foam exterior cladding, and triple pane windows. So, those are the general parameters. If, for instance, you have a home that was built in 1950, but, you had all of the windows replaced, with let's say, triple pane windows, and you had all of the walls insulated, so you've remodeled your house dramatically, and you've basically made it a modern home, but it was built in 1940 for instance, you will be able to use a much higher setting, here, in these parameters, than you originally could. so the higher the setting, the better the insulation in the home, the better the windows, and what will happen is it'll tell this humidistat that "hey i can tolerate higher humidity in the house." OK, so let's go back to this analog style, or manual style humidistat. That has the knob that you spin here. You'll notice that there are no numbers on this particular model, there are no numbers between 75 and 10. You have to kind of guess at it. The recommended settings, just, so you're kind of aware of them, these are typical of the average home. If it's 40 degrees outside, a setting of 45%. If it's 20 degrees outside, a setting of 35%. If it's 0 outside, a setting of 25%. So, as you can see, the colder it gets outside, the lower they want the humidity set point set at. It sounds kind of backwards from what you would think, because if it's really cold outside, you'd think you want it to be really humid inside, and that would be great, the problem is that most homes, you will potentially have issues with windows sweating, even potentially moisture condensing inside the walls, and those are all bad things, so you have to kind of strike a compromise between what would make me perfectly comfortable, which would be about 45%, typically for most people, and what's going to stop my home from sweating, and those compromises are typically made here at the humidistat. So, again, the colder it is outside, you want to lower the set point. So, we have the average temperature outside, on a week is, let's say 20 degrees outside. You want to try for about 35% as a setting, and you don't need to be messing with these everyday, but if you have a mechanical style stat, like this, you might want to go there and try and tweak it, maybe, every couple of weeks and try and get it again where it's compromised between you are comfortable in the house, and the windows aren't sweating, that's all you're trying to do is stop the windows from sweating.
Thanks for watching! For additional help or questions, feel free to contact us.
Damper Assembly: How It Works
Hi, I'm Jay, and one of the common questions we get every year is "how do I set this little knob on my humidifier?" Now, this particular one, this is a newer style humidifier, and it says "open" or "closed." Now, over the years, these have had different types of printing on them. Sometimes they have said "winter" "summer," sometimes they have said "low, medium, high." Basically, this knob controls a little door. In the closed position, right here, the door is closed. Ok, so there's what's called a damper, that damper or door is closed right now, when it's in the "closed" position. On older models of these humidifiers, it was again sometimes called "low," or sometimes called "summer." So, "summer," "low," "closed," those are all closed. In the winter time, you'll want to use your humidifier, so you'll want to have it in this position here, which actually now this door is like this. So, it says "open" and again in some of the older models, "open" was also called "high," or "winter." So, rightnit's open, that's the position you want it in, during the winter, "closed" that's the position you want it in during the summer, when you're not using your humidifier. So, it's winter time right now, We're going to leave it in the open position.
Thanks for watching! For additional help or questions, feel free to contact us.
HVAC System Overview
Hi, I'm Jay, and we get some questions on a regular basis about "hey what is that thing attached to my furnace?"
So, we have our demonstration unit here. And let's just talk briefly about what all of these bits and pieces are. Ok, so right here, this is the return air duct work. So this duct work goes from inside of your house, to the furnace, and this takes all the hot air in the summertime, and the cold air in the winter time from your home and brings it to the furnace to be heated or cooled. So this return air duct, the air travels down the duct, in this case. It makes a turn, and happens to go through an electronic air cleaner, this is an Electro-air electronic air cleaner. Goes into the furnace to get heated or cooled, comes back out of the furnace; this is a cooling coil here. So if you have air conditioning, you'll have one of these sitting on top of your furnace. So the air would then blow through here, and out the duct work and back into your home. Now, this one has a couple of other accessories aside from the Electro Air Electronic Air Cleaner. So there's a GeneralAire UV System in this particular unit, in our demo unit. You may or may not have a UV system, but if you do, they are commonly installed here it can also be installed inside of the plenum. This one happens to be a return air style. There is also a humidistat. This humidistat controls the humidifier which we will talk about in a minute. So it also has that, and it has this little water saver device. Which is an accessory that GeneralAire makes that you can have it on your system or not, they're not real common but in our demo unit we have one here. So, we get over to this side here, up inside here we have a GeneralAire bypass style humidifier. They are often found bolted to the side of your furnace, they can be bolted here, they can be up here on the supply plenum, the other place these can be located is over here, on the return air duct. Sometimes people put them here, I prefer to have them over there, but if you don't have the room sometimes they'll be located in this position. And that's about it, that's al the bits and pieces that are associated with the modern heating and cooling system.
Thanks for watching! For additional help or questions, feel free to contact us.
Documentation
Still Need Help?
Live help is available. Feel free to contact us.
Browser Not Supported
You are using Internet Explorer as your browser, which is no longer supported by our website. Because of this, you can view products but not place orders using Internet Explorer on our site.
Please update your browser to any of the modern browsers listed below or use a different internet browser to place an order on this site.
If you have any questions or need assistance with placing an order, please contact us at 800-825-2148 or [email protected]


